THIS BLOG HAS MOVED!
for the time being i will keep my old posts here at blogger, but i have imported all content to wordpress. please don't abandon me! to stay updated, head on over to my new space and follow me there. thanks!
—lisa g.
last but not least... costume number four!
okay, i think after my sewing marathon of trying to finish these costumes as fast as possible i started to go a little crazy and get kind of exasperated with simplicity's children's patterns and their bizarre fit. however, i will not rant. i did plan on adding useful tips and whatnot throughout the costume posts so they weren't a complete bore, but i ended up chucking the camera to the side (or losing it under a pile of fabric) and just went for the finish line. i barely stopped to eat, let alone snap pictures so, my apologies if i am boring you!

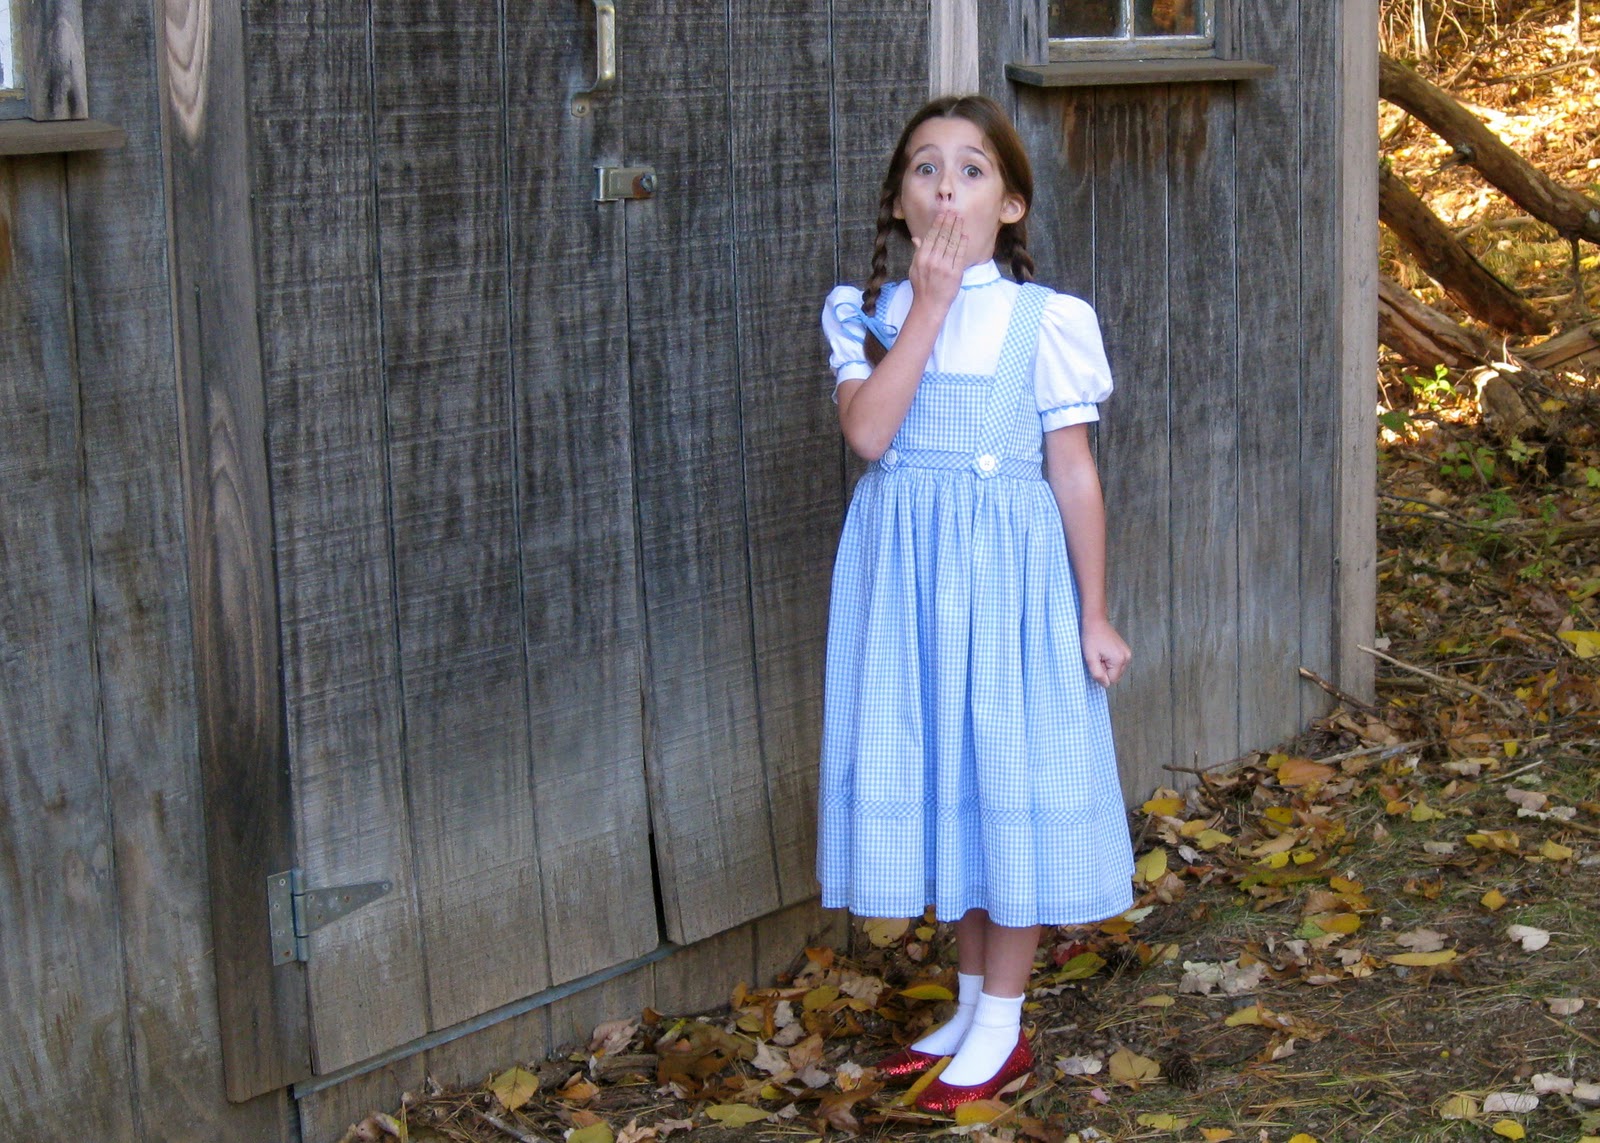
anyway, my eldest daughter anastasia who is 7 years old, is dressing as dorothy from the wizard of oz. if you don't know, i grew up in kansas and lived there until after college and i've always wanted to dress up one of the girls as dorothy. you know, because everyone in kansas lives on a farm and watches their houses get picked up and blown around by tornadoes every spring. i'm kidding. sort of... completely independent of my kansas roots, i just happen to love this move.
i used simplicity 4139 which really is a nice replica from the movie. i chose to disregard the directions which had you sew the faux blouse and faux jumper together at the side seams and shoulder seams. it was kinda weird. i mean i get it, it's a costume, but i couldn't quite do it that way. so i left the blouse and jumper independent of each other except at the waist and center back. i didn't want to mess with two separate closures or two entirely separate pieces so that's what i went with.
again, like the snow white pattern, this is cut for a curvy figure! my daughter perfectly matched up to the waist and chest measurements of the size 5 (she's tall and skinny) yet after trying it on her i still had to take a full 2" out of the top of the bib pieces. weird. anywho...
i'm really happy with the results and of course, she loves the outfit! the kids can't wait for halloween, let's just hope it isn't freezing! right now it's 40 degrees and we're supposed to get snow tonight. why can't halloween be in september or something?
so now that i'm done with all that i can start tackling everything that i neglected while i was sewing. like my children, laundry and general housekeeping. oh, and all the other sewing projects i have lined up!
have a safe and fun halloween!
next up in the halloween costume department is my 5 1/2 year old daughter sylvia and the little man of the house, 2 1/2 year old oliver.
sylvia is our reigning princess, fashionista, diva, you name it. i've always thought she would make a cute snow white so that's what we did this year! i used simplicity 2563 which was great because i didn't have to make any design changes. i used this pattern last year for the cinderella look so i knew i'd have to make a few adjustments. i don't know why but the cut straight off the pattern is so curvy! as in tiny at the waist and tapered out at the chest. now, my kids aren't particularly busty (???) so i fit the pattern at the chest and brought it out at the waist. also the neckline is cut really low so i raised it by a full inch. doesn't someone test these things out first? i mean, really! busty and low cut for a toddler pattern??? c'mon. fortunately i knew all that going into this dress so i could make the adjustments ahead of time.
i used a basic acetate satin, same as the bee, in fact. since it is a little thin i underlined and lined the bodice. not trying to go all crazy on this one, but i wanted the point at the front of the waistline to stay in place so since i happened to have a small piece of boning laying around, i put a strip of it down the center front. yes, i know, a 5 year old doesn't need boning in a costume... but it always bugged me about the cinderella dress i made last year. the point kinda sticks out and without support this would have done the same. don't judge me, i'm not crazy. oh, wait...

i lined the skirt with taffeta to give it some body and up the "swish" factor. i hand stitched the yellow bodice lining, made the detachable collar and red headband... this dress has far more details than i realized when i started it so it definitely takes a while to put together. but, it is a great snow white replica so i won't complain. some of the patterns out there are way off base! i do kinda wish i had done the bodice in a navy velveteen or something, but as i will never make this dress again(!!!) i'm not going to dwell on it.

so after all that we thought it would be cute to dress oliver up as dopey to go along with the snow white costume. he was originally going to be something completely different but after an afternoon of mad searching and being unable to find a very key piece... i had to come up with something else. his favorite color is green and he has a speech delay so he doesn't talk much, and since dopey doesn't talk at all... well it's a match made in heaven. he's shy, so he'll probably do a lot more nodding than talking anyway!

this one i pretty much drafted myself. i had a robe pattern that was several sizes too small so i used that as a starting point. the great thing about a dopey costume is that his outfit is huge and disheveled so i really had no need to go crazy about fitting anything! i made it out of fleece for comfort and warmth (and it was 60% off at the fabric store, bonus!). i resisted the urge to line the outfit and simply went au natural on the inside. i barely even trimmed my seam allowances. i sewed big buttons down the front but used velcro on the inside for the actual closure. typically i'm against fake closures, but if you've ever tried to button up a wiggly 2 1/2 year old, you'd know that this was the most appropriate option. i hand stitched patches on the elbows and whipped up a slouchy purple fleece hat. throw on a belt and there you have it!
i have been buried underneath mountains of fabric for this year's halloween costumes and i'm sooooo close to being done. just need to finish off the last details! so here is the first one in the lineup. it is a project in which i take a super easy pattern and turn it into a super complicated one. fortunately, it turned out really great.
i really got my start sewing by making my girls their yearly halloween costumes. after several years of that it finally dawned on me that my skills were good enough to make "real" clothes. you know. for me! at any rate, i really look forward to halloween. the days (weeks, now that i have four munchkins to dress up) slaving over the sewing machine for the hour or two the outfits are paraded about... it seems silly, but i guess i enjoy the crazy.
first up this year is a bee costume for my almost 4-year old isabella. we've called her "izzie busy bee" ever since she learned to crawl, and finally this year she went for the bee costume. i used this really easy pattern, 2073 by simplicity. it's designed to be a funky generic princess/fairy/witch starting point. it has this great hoop skirt hem to make it all space age and kinda of dr. seuss like. i thought the shape of the skirt would look killer done up in stripes all the way down and that's just what i did.
i won't go into much of the details of construction here, but i took each of the seven panels of the skirt and cut them into 2" stripes. this gave me a total of 49 pieces for the skirt alone. as i was penciling in the stripes on the pattern pieces i had this brief moment of clarity where i could have turned back. but i snuffed out the little voices and went with it anyway.
despite the hours and very meticulous planning and—please don't anyone touch the pattern pieces or even breathe anywhere near my sewing table!!!—it was totally worth it. to keep the most continuous stripes i sewed all the stripes together first, as in from side to side, then sewed the stripes together to build the skirt. i could have just pieced each panel individually but i was worried about my seams/stripes not matching up. so i did the front and back then joined the side seams. if that all didn't make sense, don't feel bad. a project like this is only for the insane. while it's not perfect, it's pretty darn close. in fact i can't believe i pulled this off... did i mention 49 pieces for the skirt alone???
i fully lined the dress and added boning around the hem for the stand out skirt part, made a stinger to sew onto the backside, a set of wings and a headband antennae... and there you have it. the perfect little bee!
 |
| buzz! |