Pages

Monday, October 29, 2012

project winter coat: finished it!

holy smokes! i made a coat! a real coat that looks... real!

woooooo!!!!!!


way back when i started planning out this coat, the style, fabric choices, etc... my oldest daughter (8 yrs old) was nosing over my shoulder and said: "what, are you making a sherlock holmes coat?" huh? no. well... oh... hmmm. see, i kind of became obsessed with all the sherlock holmes novels and stories this year along with the fabulous bbc tv show "sherlock" (seriously the best show ever. ever.). in the show, his classic trench coat is almost a character in and of itself, and i noticed that it has red buttonholes. which got me to thinking that i, therefore, needed pink buttonholes on my coat.


so i finished this little beauty off with some fancy hand worked buttonholes. i won't go into detail about them as i am by no means an expert. i don't have a keyhole button feature on my machine so i had to go with either bound or handworked. and since i wanted bright pink thread... handworked it had to be.


oh how naive i was. not only was it a challenge just to locate the right supplies, my research indicated that handworked buttonholes are a tailoring specialty. and having  done a few, i can see why.


so i practiced and practiced and practiced my stitches. the thing is, using a contrasting thread color, every imperfection is highly visible. so as much as i just wanted to jump right in, i kept practicing until i had something passable. i have to say, i've kind of fallen in love with making them. so much so, that i didn't stop at the three buttonholes the pattern calls for, but added a lapel buttonhole and functioning buttonholes on the back tie.


while they are faaaaar from perfect, i love them. and i plan to order that giant spool of gimp so i can keep practicing, because there will be more of these in my future.


the only other detail i haven't shown here is my interior pocket. i had planned to show you how i made it and such, but i so badly botched the construction that i'm just happy it both functions and isn't terribly unsightly. seriously, i've made so many welt pockets over the years, why i screwed this one up so badly i will never know.


but, there you have it. you've seen every inch of this coat, inside and out, and i hope my extensive posting has been helpful. now i am soooo ready to make something quick and easy!


oh yeah, and i love it!!!

—lisa g.

Saturday, October 27, 2012

project winter coat: bagging the lining

it's time to talk lining. there are about as many ways to finish a coat lining as there are people lining coats. and, until you've done one yourself, it's just hard to visualize what the heck they're all talking about! what i'm showing here is a super easy, no-hand-stitching-required way.

but before i get to that... a long time ago i mentioned that i planned to interline my coat for warmth. i hemmed and hawed over how best to add that extra layer. initially, i had planned on constructing a flannel layer of the back and side front pieces then catch stitch it to the coat at the neckline and down the princess seam of the front. i was undecided on whether or not to do the sleeves, so i kept mulling it all over and did some online research. there isn't a whole heck of a lot of info on this topic, but most everything i found suggested underlining the lining fabric and finishing construction like that. initially i didn't like this idea, but ended up coming back to it and that is what i did.

everything was fine and dandy until i needed to do the bagging, and turning the coat and all the little interior finishings. since the inside of the lining was flannel instead of slippery, this all became quite difficult and i ended up doing a lot of hand stitching that otherwise would have been done by machine. if i were to do it all over again, i would definitely choose a different method. that said, my hand stitching was still minimal.

at any rate, while discussing this with my sister, monica, who is sewing up a different version of the same pattern, i suggested she try catch stitching flannel to the inside of the shell, so i'm sharing pics of her interlining.


here's a sneaky peek at her coat... so cute!


okay. so, assuming that you are going the "no hand stitching" route, when you construct your lining, leave an opening in one of the sleeves. you will need to allow 8"-10", because you will ended up pulling the hem of the coat out through this opening. i'll get to that in a bit. if you haven't attached the lining to the facing, now is the time.

your sleeve lining should be about 1" shorter than the shell (and the same at the coat hem). with your shell and lining together, make sure the seam(s) in your sleeves are lined up, turn them in toward each other then reach up through the hem of the coat in between shell and lining, and with your other hand grab that little part you had pinched and pull the sleeves out.


both the shell and lining of the sleeve will be inside out. if you haven't done this before, it will feel weird, but it works. just trust me. so pin all around the sleeve openings and stitch them together.


then stick your hand in the sleeve from the shell side and pull the sleeve out and adjust the hem so it is even and laying properly. repeat with the other sleeve. if you need to, take a few stitches and tack the turned sleeve hem at the seam allowance(s).


now turn the coat and lining inside out, and stitch the bottom edge of the facing. when you get to the point where the facing meets the lining, pull the lining down and stitch diagonally, then continue stitching the bottom edge of the coat.


repeat with the other side leaving 8"-10" open. check out sherry's post on this step HERE, she illustrates it better than i do. turn the coat right side out through the hem opening. now, to close the hem by machine, reach down through that opening in the sleeve, grab the hem and carefully pull it out through the sleeve just enough to finish stitching the hem. 

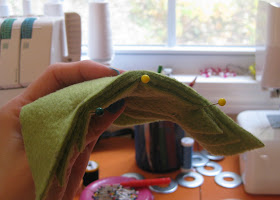
if you think you have too much bulk to do this, just slip stitch the gap in the lining at the hem. give the hem a good hard press making sure the hem is even and everything is laying as it should. but do take care not to let the iron rest over the plastic head of a pin...


guess who'll be buying some glass head pins? that'd be me. lucky this didn't melt on to my coat. eeps!

sherry has great tips about sewing the seam allowance on the inside of the coat to keep the hem laying properly (same link as before). if you can't do it as she instructs, just tack the hem at the seam allowances to make sure the hem stays crisp and in place. then remember that opening in the sleeve lining? just pull it out, pinch it together and edge stitch it. since it's tucked inside the sleeve, it will never be seen! so clever!

after all that, i finished off my coat with some top stitching, removed the basting stitches, and finally made my handworked buttonholes. actually, i just finished sewing on the last button this morning. so excited to show it off!

—lisa g.

Tuesday, October 23, 2012

project winter coat: the collar and facing

now we're ready to sew on the under collar to the shell. this can be a little tricky, and honestly i don't have too many words of wisdom here other than TAKE YOUR TIME. this isn't one of those "i just want to finish one more step before i stop" bits. if you rush through it, you will most likely be disappointed.

this the the under collar piece with  an extra layer of fusible to
serve as a collar stand. this supports the collar and helps it fall properly.

now, some jackets have a neck seam that is curved all the way around and some are squared off and have a pivot point. either is tricky, but i tend to prefer the type with a pivot point because you can stop and evaluate your work before getting the whole thing in. for the type that curves, just remember that you are lining up the seam line not the edge of the pattern pieces. how ever your pattern is drafted, you will need to stay stitch the neck at the seam line and clip in a few places to make all of this easier. if in doubt, hand baste first to check your work! i don't really have pics of all this because you wouldn't really be able to tell what i was doing anyhow, but here is sherry's post with really nice pictures! when you have the collar on, press the seam allowance open. if it doesn't lay perfectly flat, clip where necessary.


now that your shell is complete, you can assemble your facings and/or lining. if your pattern has a back neck facing, sew your facing pieces together at the shoulder seams and attach the upper collar. if there is no back neck facing piece, you will need to assemble your whole lining, front facing pieces and then attach the upper collar. if your pattern doesn't have a back neck facing and you want one, see how to draft one here.


now, i'm not doing much hand sewing for this coat, but i found it really helpful to catch stitch the seam allowance on the collar side up. doing so is optional, but it keeps this seam out of the way nicely.


okay, now things start to get serious. pin the collar pieces together around the outer edge. your pattern should have some turn of cloth allowance so the upper collar will be slightly larger, and need to be eased onto, the under collar piece. the easiest thing to do is let your sewing machine feed dogs do the work by sewing with the piece that needs easing on the bottom. where you begin and end sewing around the collar, make sure you turn up the seam allowance. most likely your pattern is marked with a dot here, this is the notch in the collar. by the way, if you have a shawl collar, obviously this won't apply and your collar and lapel will be all once piece.


once the collar is sewn, next you sew the lapel. beginning at the notch (again, your pattern should be marked with a dot here) and making sure not to catch the collar pieces, begin sewing and sew all the way down the front edge. repeat on the other side. there should also be some easing of the facing onto the shell, just let the machine do this work for you.


now you'll need to trim, clip and grade all the way around the collar and facing. i ended up trimming down the corners to about 1/8", but leaving the straight bits as you see below.


once the collar and lapel is sewn, pressed and under stitched where necessary, reach up and grab the seam allowance under the collar around the neck edge and stitch them together as close to the seam line as possible making sure all your points are matched. this will anchor the collar in place and keep the shell and facings from shifting.

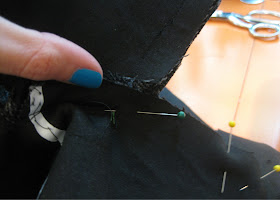
i first line up and pin on the seam...

...then flip up the facing, grab the SA and stitch

lastly, i basted the entire collar, lapel and front edge so i could give it a good hard press. if you do this, make sure you roll the seam allowances under around the collar and lapel, then toward the inside from the break point down.


things are looking good now! so close to finishing...

—lisa g.

Monday, October 22, 2012

project winter coat: custom shoulder pads

i'm not much of a shoulder pad person, but i do know that a tailored coat needs some oomph to maintain the structured shoulder you've worked so hard to achieve. i never could remember to hunt down  shoulder pads when i was at the fabric store or shopping online, so i decided to make my own. i loosely followed instructions i found in singer's "the complete photo guide to sewing" (good book, by the way. i found a copy at the library and it seems really useful!). they call for batting, but i just used more of the polar fleece i have lying around. if you use fleece, it won't be quite as structured as the stiffer batting, so just keep that in mind when you select materials.


to start, take your front and back pattern pieces and line them up at the shoulder's seam allowance. tape it together then place tracing paper on top. trace the armhole between the ease points and mark the shoulder seam. make sure to label which side is the front and which side is the back, as they are not symmetrical. then just draw a curved line up to about 1" from the neck seam.


determine how many layers of fleece/batting you need. for me, three layers gave me 3/8" which is a hair thicker than the 1/4" called for in the pattern. since fleece is more squishable than batting, it will work out perfectly.


cut each layer to be about 3/4" smaller than the one before it. make sure your shoulder seam is marked on each piece so you can line them up easily. now, curving them in your hand, make a running stitch along the straight edge to keep it all together. don't bother with knotting your threads, just take a back stitch at either end.


once you have done this, make radial stitches throughout the shoulder pad starting from the center and shaping it as you go. once you're done, your pad should hold a curve on it's own.


now cut two pieces of muslin and pin it together around the shoulder pad and trim the excess from the bottom layer so it is even. then serge or zig-zag around the rounded edge (careful to maintain the curved shape) to close it up.


on the straight edge, just whip stitch the muslin to the next layer of fleece/batting to keep it all together without squishing it down.


and there you have it... custom shoulder pads!

—lisa g.

Friday, October 19, 2012

project winter coat: setting in the sleeves

having to set in a sleeve can strike fear in the heart of many a sewist. can't say i was much different until i discovered this super awesome technique. i wish i could say i am the genius behind this little trick, but truth be told i found this while scouring gertie's blog a while back for tailoring tips (HERE). i first tried this when making my knit blazer and then again on my coat. seriously, it's like magic.

once your sleeve is sewn together, make sure you have a few points marked: where the cap crosses the shoulder seam, the two ease points and the point where the sleeve crosses the side seam.


now grab some polar fleece (which just about everyone has lying around) and cut two 2" x 12" bias strips.


mark the center of the strip with a notch and line it up with the top of the sleeve cap. then stitching at 4/8" (assuming a 5/8" seam) pull the fleece quite tight as you stitch it on. with a heavy coating, you will really need to tug at the bias strip; less so for something lighter weight. continue pulling and and stretching the fleece until you get to the ease mark, then you can release to light pulling until you get to the end of the fleece.


turn the sleeve around and do the same thing from the other direction. it's important that you start your stitching at the top of the sleeve, even though it's a bit awkward. if your machine doesn't have seam allowances marked on the left side of the needle, just put a piece of tape on the machine as a guide.


turn your sleeves right side out and make sure you know which sleeve is which (right or left). mark it if you have to, the last thing you want to do is try to attach the sleeves to the wrong side.


turn the coat inside out and place the sleeve inside the armhole. you'll see that it fits in with no further easing necessary, no pulling of gathering stitches, easy peasy. pin it in place, matching all your notches and dots and whatnot. you can baste the sleeve in place first if you want, or just stitch if you're feeling confident.


once your sleeve is in, round off the ends of the bias strip. lightly and carefully press the whole seam allowance toward the sleeve just with the tip of your iron. you don't want to get too far into the sleeve or you may get some unwanted creases.


now, step back, breath a sigh of relief and admire your handiwork!


next up... how to make shoulder pads!

—lisa g.

Tuesday, October 16, 2012

project winter coat: in-seam welt pocket

once everything is fused and cut it's...

wait for it... 

SEWING TIME!!!

so now you'll do your major construction of the shell. after all the laborious (and boring) prep work this will feel like a fast forward moment. sew, press, repeat! just remember all those things about not pressing directly on the wool (use a press cloth) and other words of wisdom. later i'll have some tips to post for the collar and sleeves, those can be the tricky bits.

since there isn't much to write regarding the main body construction, i'll show you how i made my in-seam welt pockets. the pattern has the pockets in the side seam, but i prefer they be in the front princess seam. less bulk on my hips this way! in case any technique with the word "welt" in it makes you run in fear, this is about as easy as it gets. in fact, an in-seam welt pocket is virtually the same as a regular in-seam pocket. just with the addition of a welt.

shall we?

i drafted my welt so that once sewn it would be as wide as the distance between the two dots on the pocket piece, which is just the width of the pocket opening. begin by making your welt. you need to sew around the three sides of the welt, turn right side out and press. top stitch the edges if desired. i hope you can use your imagination on that one as i don't have a picture. 


the fact that my nail polish matches
my coat lining is pure coincidence!

baste the welt to the seam (right side of the welt to the right side of the coat), then sew the pocket bag directly on top of your welt basting (just over the pocket opening) then press the pocket bag back. baste the other pocket bag to the adjoining seam, again stitching only along the pocket opening. press the pocket bag out and under stitch if desired.


now lay both pieces on top of each other with the pocket bags sticking out. at this point you want to make sure your seam lines up accurately. i place a couple pins over the pocket opening to hold it in place, then turn back the shell and stitch around the pocket bag then finish the seam.


now you can pin the rest of the coat seam together and sew above and below the pocket opening; stopping at the pocket opening, then picking back up again on the other side. when you get close to the pocket opening, make sure you grab that corner of the pocket bag so it doesn't end up caught in the seam. then press the princess seam toward the center


i am top stitching along the princess seam and had to do a little manipulating so i didn't sew the pocket shut. on the inside, i pinned the pocket bag out of the way, then on the front top stitched the part of the seam that crosses the welt.


then i unpinned the pocket bag and pressed the seam toward the middle and top stitched from the top down, pivoting inline with the top stitching on the welt, then stitching over the welt securing it to the coat, back stitching at the end to reinforce it.


i feel like this is a lot easer with pictures than with words, sorry if all i've done is confuse you more! really, it's far easier than it might sound.


future posts will include some tips about setting in the sleeve, how to make a custom shoulder pad and how i plan to add an interlining for warmth. exciting stuff people! my coat is finally coming together (i'm a bit farther ahead than these posts) and it's looking awesome. can't wait to show it off!

—lisa g.