to backtrack a step... ever wonder what to do with the little tails of thread from sewing a dart?
sometimes it's just too much work to thread and re-thread the machine for the couture dart. grab your hand sewing needle and thread it with the tails of thread. then bring the needle through the fabric taken up in the dart and out.
pull the thread tight and clip right where you've pulled it out of the fabric.
ta-da! no tails hanging out!
and here is the completed bodice. i really love the button and loop detail. it's a small thing, but it makes it so much easier to get in and out of the dress!
the skirt of the dress was surprisingly quick to put together, considering it has pleats and in-pleat pockets. i love the pockets! yes, any dress with pockets automatically gets higher points in my book, but i'm not really a fan of side seam pockets. they tend to flap around a little and create weird bulk at the hips if you actually use the pockets. and what's the point of taking the trouble to put pockets in if you don't use them?
i highly recommend that you don't plow through this step! fortunately, the directions are very clear. plus it's great to know how to do this type of pocket, i'll definitely use this technique on skirts/dresses in the future!
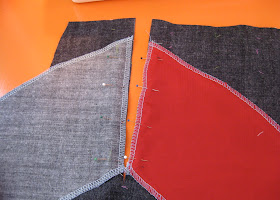
once i had the entire shell constructed and hemmed, i moved on to my lining. this was my first time using bemberg lining, and by the time i was about halfway through my lining construction i was convinced that it would be all off. that stuff is shifty!!! but so soft and lovely... at any rate, i muddled through and my seams are surprisingly straight. i used my serger to sew it all up, saving me from stitching then finishing my seams.
also, instead of the usual construction where you basically work from the bodice down, i sewed up the entire front panel, then the entire back panel, finished all the edges then sewed the front and back pieces together at the side seams.
i have to say, after seeing all this lovely red, i definitely need a fancy red dress at some point.
okay... i'm almost there! just need to hand stitch the lining in place and attach it at the zip. next will be the finished product! stay tuned!
—lisa g


WOW you are really good!!! I wish I can sew like you!
ReplyDeletethanks, you're so kind! i spent a lot of time sewing stuff for my kids before i thought i was good enough to sew for myself!
Delete