Pages

Tuesday, July 26, 2011

"go-go pick a daisy" dress finished! and, the couture dart

after inserting the zipper and finishing the bias bound neckline and hemming, the "go-go pick a daisy" dress is finished!


i'm very pleased with how this turned out, it's a simple silhouette that really shows off a cute fabric. i'm sure this one will get plenty of use!


notice how my daisies all line up from the bodice to the skirt? even at the pockets? just thought i'd point that out...


before i finish, i must show you this very awesome technique for sewing darts. so i've been geeking out over a few sewing books lately and picking up a few tricks and tips to incorporate into my everyday sewing. one of my favorites is the single thread (or couture) dart. this is a way to sew a dart into the fabric without having a knot or hanging threads at the dart tip. this is too cool, so follow along...


first, thread your machine as usual and draw up the bobbin thread as usual.


then, pull the thread out of the needle...


and thread the bobbin thread through the needle going from the back.


then knot the top thread and bobbin thread together... 


and wind the thread spool back until the knot it up to the spool.


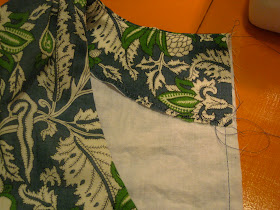
you want to make sure you have enough thread clearance so you can sew one dart without the knot making it to the needle. now, sew the dart starting at the tip of the dart. make sure your first stitch lands in the fabric.


sew as usual all the way to the outside edge of the dart, reducing your stitch length as you near the edge. reducing your stitch length makes it so there is no need to tie off your threads as they are likely being sewn into a seam anyway. cut threads and re-thread the needle as before to sew the next dart!


how cool is that? it's called the couture dart but really there's nothing fancy about it. i generally hate sewing darts but learning this technique just made it a little more fun!


one more picture of the dress...


isn't she snarky? okay, okay... i'll stop...

Thursday, July 21, 2011

a little bias tape

next up on my sewing table is an outfit for my 7 yr old. i was ordering some inexpensive clearance fabrics for a few summer dresses and i picked up this cute little cotton print.


it's one of those fancy organic cotton fabrics. i was kinda hoping to be terribly unimpressed by it because it's more expensive per yard than what i usually buy... but it was just so gosh darned cute. as luck would have it, the fabric is adorable and super soft. grrr... i hate it when i like expensive things... i only bought a yard because i was planning to make a skirt but i've managed to eeek out a little shift dress instead. i'm calling it the "go-go pick a daisy" dress. aren't i clever?


i was too cheap to go buy a pattern, so i frankensteined (yes, it's a word... maybe) together a few pattern pieces in my stash, graded them to be the right size, traced, re-traced, tissue-fitted... i think i pulled this one off. it's supposed to look something like this.


aside from the super cute print, what will really pull this dress together is the finishing. now, usually i'm too lazy or just too caught up in the sewing to think about trims and bias tape and lace and whatnot. but, i'm working on my embellishment skills and i thought this dress would be adorable with a few bias tape details. i am adding flat piping at the waistband seams and bias trim around the pockets, armholes and neckline.


first up, flat piping... i started out by making several yards of bias tape. if you've never worked with bias tape before i suggest taking the easy way out and buying it pre-made. my own tape isn't perfectly even so to make sure it turns out as even as possible  pin single folded bias tape (if you have double folded bias tape just press it flat so it is only folded once) to the waistband and measure up to the folded edge to keep it straight. then, machine baste it in place.


make sure the raw edge of the bias tape is toward the raw edge of the waistband
once the tape is in place continue as usual, sewing the waistband to the bodice then to the skirt. once sewn press the seams in toward the waistband and let the piping turn up toward the bodice and down toward the skirt. that's it! if you measure first (and can sew reasonably straight...) this is a super easy embellishment to do.


to make sure the piping stays flat and going the right
direction, top stitch close to the edge of the waistband
the bias-bound edges are slightly trickier. now, i hear there are fabulous presser feet that fold and bind the tape as you sew. i don't have this fancy little contraption so i have to attach it in steps.


first, make sure the seam allowances are removed from the edge being bound. then i find it easiest to attach the bias tape first by hand. with the edges lined up, use a running stitch to baste the bias tape along the edge, stitching slightly in from the crease of the tape. if you are working with a fairly straight edge you can do this with the sewing machine, but around small armholes i feel doing it by hand gives me greater control.


once you have gone all the way around, fold the bias tape (i told you i was using double folded tape, right?) around the edge and pin it in place. then, simply machine stitch close to the inner edge of the tape (on the outside of the garment). this should catch the tape you just folded to the inside of the garment. if for some reason your stitching falls off this inside edge, just hand stitch it in place later. it happens, no biggie.


stitching right along the inner edge on the bias tape
i also did this earlier on the skirt pockets before attaching the waistband to the skirt, by the way.


i think the edges finished this way are just adorable plus it emphasizes all the seam lines that would have gotten lost in the fabric print. i want to insert the zipper before i bind the neckline edge, then all i have left to do is the hem! now, don't save the bias tape for the kidswear only, that's just what i happened to be working on at the moment. it's great for a pencil skirt or really any time you want to add a little definition to your work.

Saturday, July 16, 2011

dinner rolls

i don't know which is more disturbing... finding a super moldy and gross loaf of forgotten bread in the back of the pantry or finding one that should be super moldy and gross because you realize it's been months since you bought it. what do they put in that stuff to keep it from molding for soooooo long??? i have no idea, but every time this happens to me it reminds me that i love baking fresh bread that (if somehow forgotten) will begin to mold within 4-5 days. but it never lasts that long.


after tweaking and taking what i like from one recipe to the next, here's what i've come up with for my favorite dough recipe. it works well formed into hamburger buns (or occasionally hot dog buns) but today i'm baking them in a pan as dinner rolls. 


dinner rolls (a.k.a. "hot rolls")
yield: 15 rolls


18 oz ap flour (about 4 cups)
2 tsp instant yeast (or one packet, if that's what you buy)
2 T sugar
2 tsp salt
1 1/3 c milk, heated until warm
1 lg egg, beaten
4 T butter, cut into cubes and softened
1 T light oil
1 T butter, melted


in your standing mixer bowl, whisk together flour, yeast, sugar and salt.


then, with the mixer running add the milk and egg.


once it looks like this, add the softened butter.


turn the mixer up to medium speed and let it go for about 8-10 minutes. this dough will start off very loose. you may be tempted to add extra flour. don't. it will be fine.


here's what it will start off looking like:


after those magical 8-10 mins have elapsed, it will look like this:


if it doesn't look like this... keep mixing!


see? don't add extra flour!!! also, keep an eye on that mixer, mine tried to walk off the counter from all the action...


now, turn the dough out onto the counter top. drizzle a little bit of oil in the mixing bowl (no need to wash out the bowl first, mom). the dough will still be sticky but there is no need for extra flour on the counter. in fact, the tackiness will help you form the dough into a smooth ball. do this by passing dough from hand to hand and spinning the dough as you do so. it will be a little messy at first, just move the dough around to pick up whatever has broken free from your hands. what you are doing here is tightening up the surface of the dough to trap in the gas released by the yeast. a tighter skin will give you a better rise to your dough.


okay, cover and let it rise for about 1 1/2 hours.


ta-da!


isn't yeast amazing?


now, scrape out the dough onto the counter top. again, it's going to be a little sticky. that's okay. no extra flour needed. portion this into 15 little balls of dough. this is where a scale really comes in handy. if you have one, they will be 2 1/4 oz each.


once you have all your little dough balls, take one at a time to roll it smooth.


to do this, cup your hand over the dough and rotate it in a circle until the surface is taut. just like before, only mini!


put the dough balls evenly spaced in a glass baking dish. brush the tops with vegetable or canola oil (don't use butter here, it burns too quickly. there will be butter later. i promise.) and cover with plastic wrap. let rise for 30-45 minutes. at some point here, heat up the oven to 350 F. your oven needs to be ready and waiting. you don't want to end up with crazy frankendough (it's alive!!!). it's happened to me and it's not pretty.


once the dough rises enough to just touch the plastic wrap, uncover and bake for 20 minutes, or until golden brown. once out of the oven, brush the tops with melted butter and let them rest at least 15 minutes before tearing them apart to serve.


wouldn't this lovely roll be right at home among some mashed potatoes and fried chicken? 


mmm... now you're talking. comfort food at it's finest. enjoy!


p.s. to those who know what i'm talking about, these do taste like Darlene's famous "hot rolls" from the school lunchroom—back when there were lunch ladies who actually cooked the school lunches.

Tuesday, July 12, 2011

"garden party explosion" dress finished!


here is the finished "garden party explosion" dress! i'm super happy with this one. the fit is comfortable and flattering. i love how slimming it is. since the midriff hits just above my natural waistline it skims over all the bits that need skimming over.


i have a few more pics of the finished product but first let me show you my insides. okay, not my insides, the dress's insides. you know what i mean...


once the bodice and midriff were constructed i added a lining to the midriff first to make sure this area was stabilized and second to conceal some of the interior seams. to do this, i sewed the midriff pieces together at the side seams then pinned it to the seam allowance at the top of the midriff and sewed right over my first stitching. this is left free at the bottom edge and will be slip stitched in place later.


before stitching i pressed the CB and bottom edge in at 5/8" 
next i pinned, gathered and attached the skirt to the midriff. then i did the same with the lining right over (on the inside) the outer fabric. isn't attaching the skirt to the bodice such a great moment? i love finally getting to see if my original vision will in any way resemble the almost finished product!


after this, i inserted an invisible zipper...


then hemmed the dress.


isn't this a lovely rolled hem? sooo glad i have a rolled hem presser foot!
almost there! now it's time to get out your hand stitching needle and thread. first i slip stitched the midriff to the skirt. it's best to pin this before stitching to make sure it lays straight.


once that was done, i pinned then catch stitched the armhole facings to the underlining. i used a catch stitch because it allows for a little bit of movement and it will keep any fraying of the facing edge in check. you can do the same to the neckline facing, but i simply tacked it in place at the shoulder and again halfway down the neckline. this facing doesn't really have the tendency to flip up like the armhole facings do.


armhole facing catch-stitched

neckline facing tacked down
i am endlessly fascinated by garment construction, so here is the final dress... from the inside!


oh, you want to see the outside again?


zoom in! i have nothing to hide in this one!
i did attach belt loops to the midriff before inserting the midriff lining, so now i'm on the hunt for the perfect skinny belt! or maybe make my own fabric-covered belt? hmmm... in the meantime i'll wear it anyway since the belt loops are totally lost in this print. now i just need an invite to a garden party!


and here's a peek at my shoes, as requested ;-)


see my review at patternreview.com

Friday, July 8, 2011

facings

i just finished my dress (i'm dubbing it the garden party explosion dress) and i am sooooo happy with the fit! making the muslin and the pattern adjustments seriously paid off. in fact, i love the cut much more than i expected and will definitely put this in my "to make again" pile. here's a grainy, heavily cropped pic as a teaser. ;-)


before i get ahead of myself and gush about how awesomely i made this, i promised to show you how to make facings. while most of the patterns i have used don't have instructions or pattern pieces for facings that doesn't mean you can't make your own. it's super easy, here's how:


take the bodice pattern pieces and lay them on top of tracing paper, pattern paper, tissue paper, whatever you have on hand. then, decide how wide you want your facings to be. around the armholes i cut a 2" facing which afterward i decided was a tad narrow, so when i cut the neckline facing i went with 2 1/2". 


traced the outer edge of the bodice

measured and drew a line 2 1/2" in from the neckline

these are the neck facings pieces. i made the back facing wider at the center where the
zipper will be for no specific reason other than i thought is would look nice. 


since i wanted my facings to match the outside of the dress and my outer fabric is so flimsy, i attached an underlining in the same manner as before. once you've done this you will need to finish the edges. a simple zig-zag stitch works fine, or if you have a serger please pack it up and send it to me. kidding. unless you weren't...


once you have constructed the bodice with your shoulder and side seams sewn (say that 10 times fast...) you will sew the two armhole facings together and the neckline facings together. it helps to include the little pattern markings at the seams when making the facing pieces so you can sew them together accurately.


with the bodice turned to the right side, simply line up the edges of the armhole and neckline facings right sides together and stitch at 5/8" (or whatever your seam allowance is).


here the neckline facing is pinned and ready to be stitched

after stitching, grade the seam allowance to reduce bulk. do this by
trimming the facing seam allowance by about half.


once the seams are sewn and graded, press the facing up, then understitch. understitching insures that the facing won't roll to the outside and it will give you a nice clean edge. the first time i used understitching i couldn't believe what a difference it made! if you're not familiar with how to do this, basically you pull the facing only over where you just stitched and press, then you stitch very close to the seamline through the facing and seam allowances. once you have understitched, turn the facing to the inside and press.


it's hard to see with the crazy pattern on the fabric,
but this is the attached and understitched facing

turn the facing to the inside and press
i have shown you pictures of the neckline, just treat the armholes in the same manner. pin facing, stitch, grade seam, press, understitch, turn facing to the inside and press again. 


when you're done it should look like this:


don't be concerned if your facings flop around a bit as you work with the dress. once all the construction is done you will catch-stitch the facing to the interlining where necessary to secure the inside edge of the facing.


facings give such a clean and sturdy finish to these seams and prevent any of the lining from showing on the outside. i highly recommend trying this out! this is really the first time i have used this type of construction and i will definitely be using it again, especially at the armholes. i always hate it when the lining peeks out even if i'm the only one who notices!